
Recording and posting MTB rides has become increasingly popular. Even here at Everyday MTB we’ve gotten into the act of sharing some of our rides on YouTube. These videos however are not cheap to produce. Professional mountain bike vloggers are often carrying over $1000 worth of video equipment on their rides. I wanted to see what kind of POV mountain biking camera setup I could put together for less than $300. Here’s What I came up with:
Hohem XG1 Gimbal
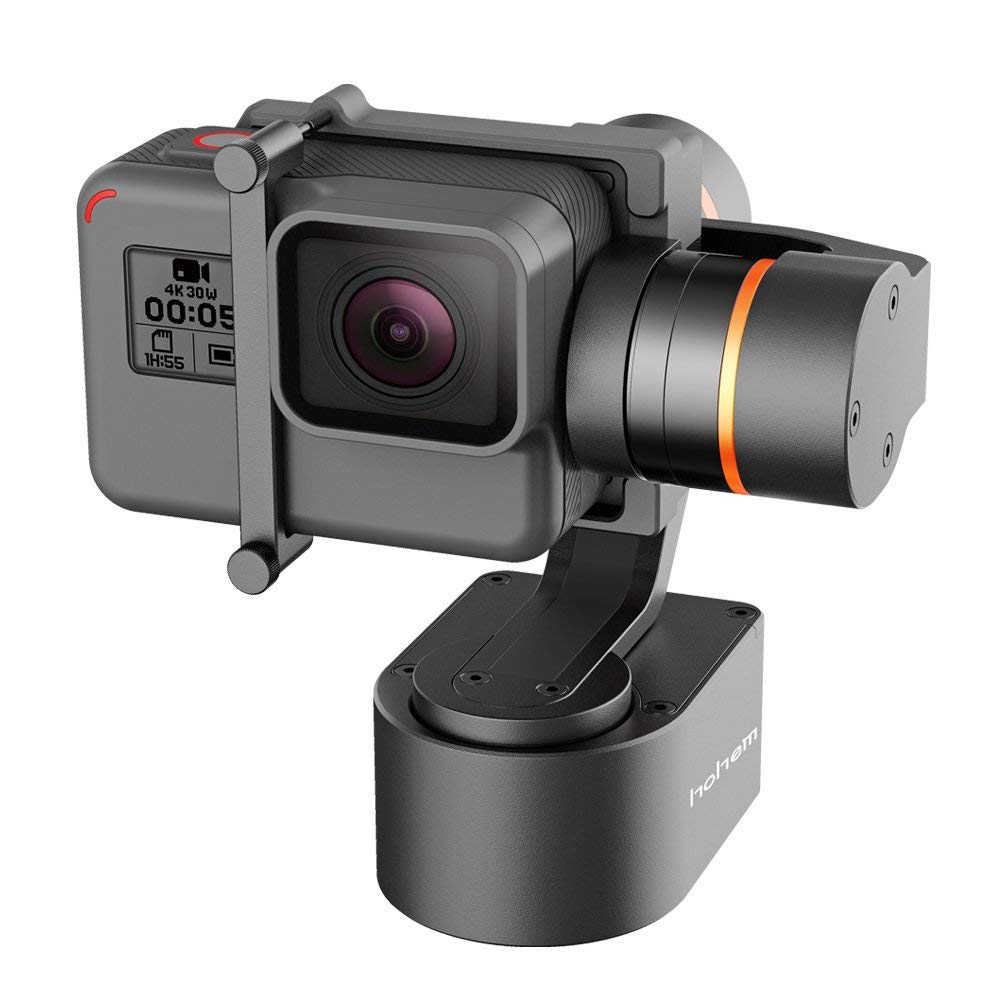
The biggest differentiator between amateurish looking helmet and chest cams and professional smooth looking POV videos is the stabilization system. Most professional MTB vloggers today are using gimbals to achieve this smooth, fluid video. The gimbal not only smooths out all of the bumps of the trail, it also keeps the horizon level which is key to producing watchable POV shots that don’t make your viewers sick.
Many riders swear by the EVO SS gimbal. It’s compact design and 3 axis stabilization make it ideal for chest mounted footage. However it does come with a $250 price tag. If I was even going to come close to my sub $300 goal I’d have to find something cheaper.
Enter the Hohem XG1 Gimbal. This gimbal has a very similar form factor to the EVO SS but costs only $149. The Hohem XG1 also has 3 axis stabilization and mobile app for fine tuning settings.
Some features are not quite as nice as the EVO. For example the battery is not removable, so if you wish to extend your battery life an external battery pack is needed.
YI Lite Action Camera
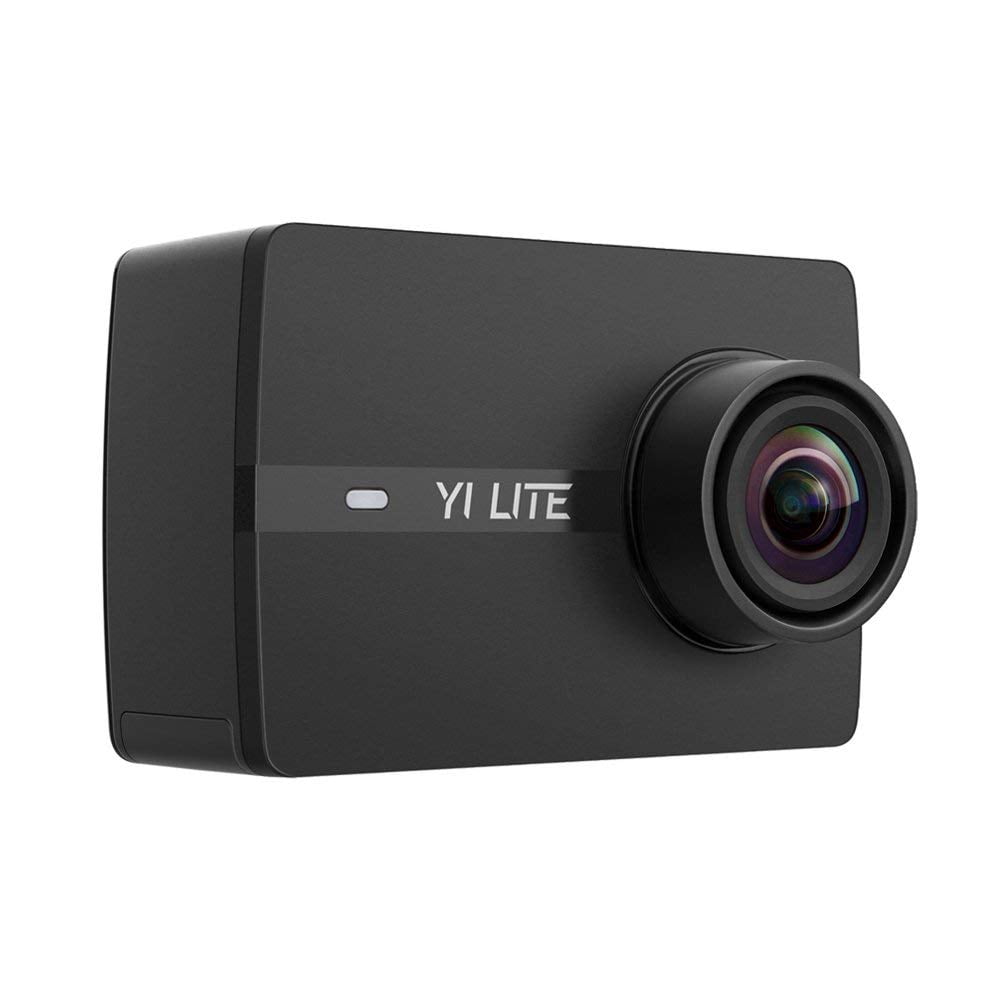
The next item that was needed was a camera to mount in the gimbal. The Hohem gimbal uses a clamping mechanism that cam accommodate a variety of cameras.
To stay in my budget, I opted for the YI lite action camera. This camera is not capable of 4k 30fps but it can to 1080p just fine and it also features wi-fi connectivity both for live view and review of footage. YI is a large electronics manufacturer in China so I chose to go with a brand that I though might have some sort of quality control.
The controls on the YI Lite action camera are easy to use with a touch screen that works surprisingly well. There is a power/record button on the top, along with the internal mic.
Stuntman Chest Harness
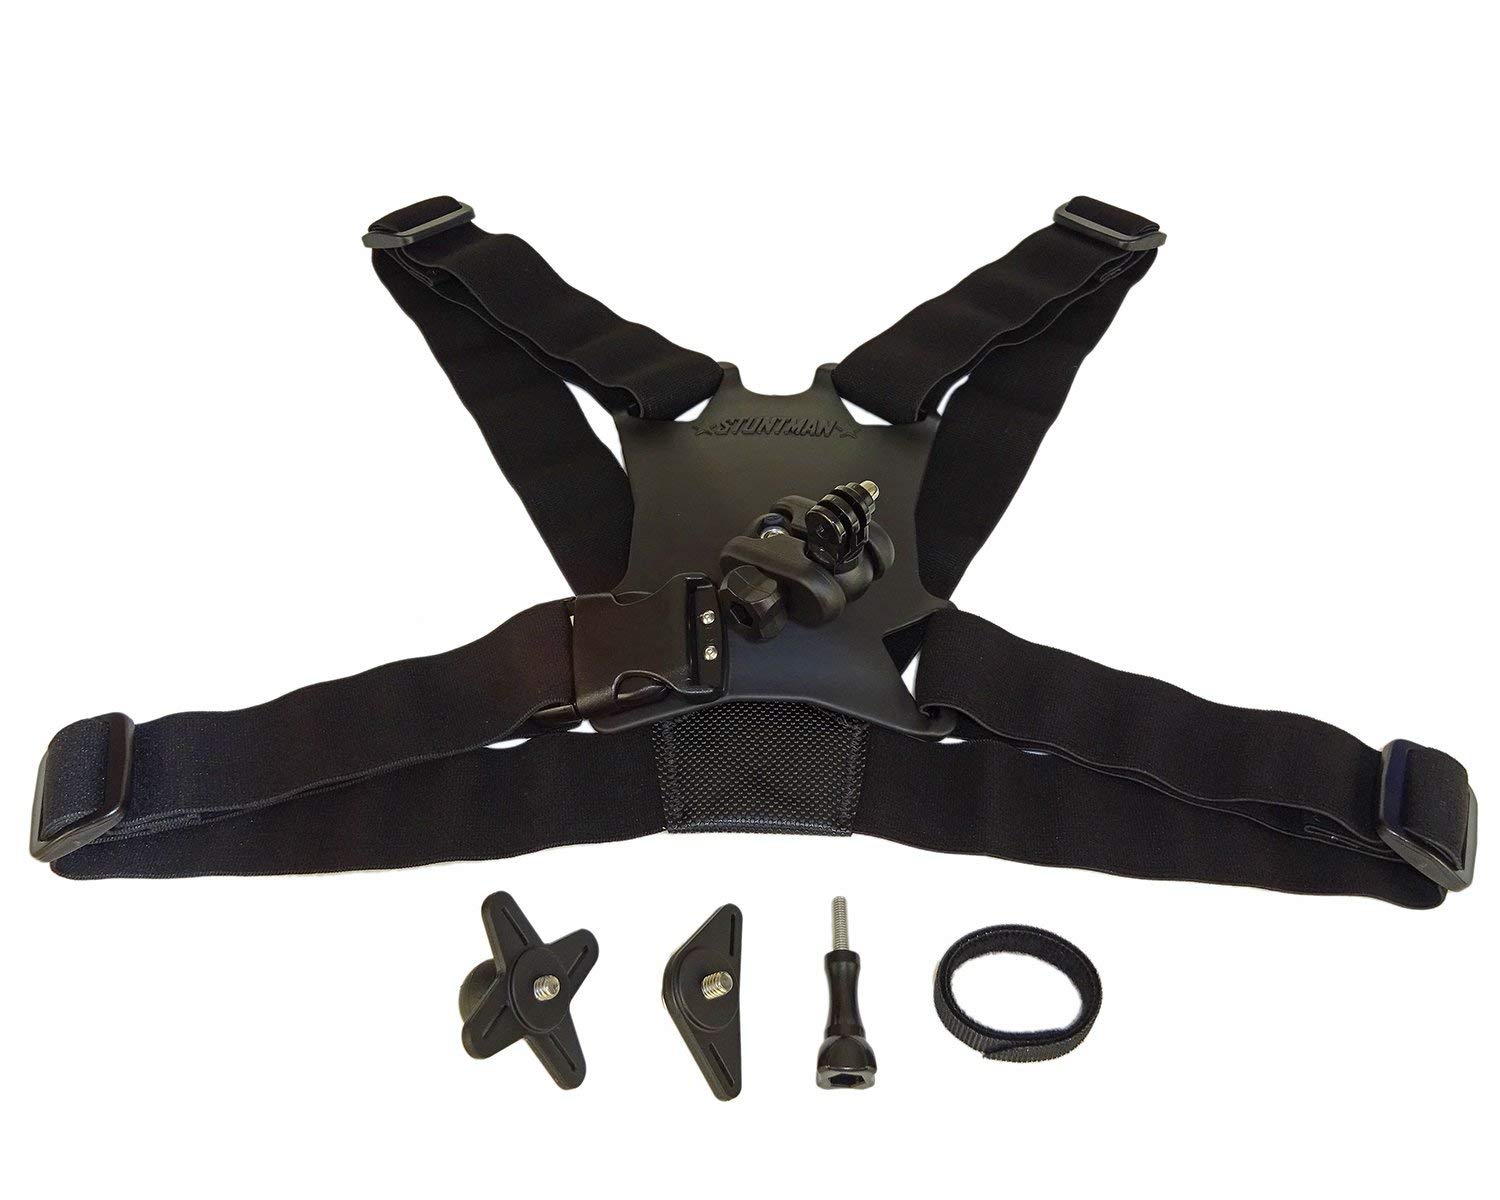
The final piece of my mountain biking gimbal setup was the Stuntman Chest Harness. Suggested by several YouTubers, this chest harness features a flexible ball mounting system and a larger chest plate for increased stability. I was very impressed with the quality of this Harness and it’s probably the most premium part of my setup. Still, at only 36.99 it isn’t a huge investment.
How Does it Work?
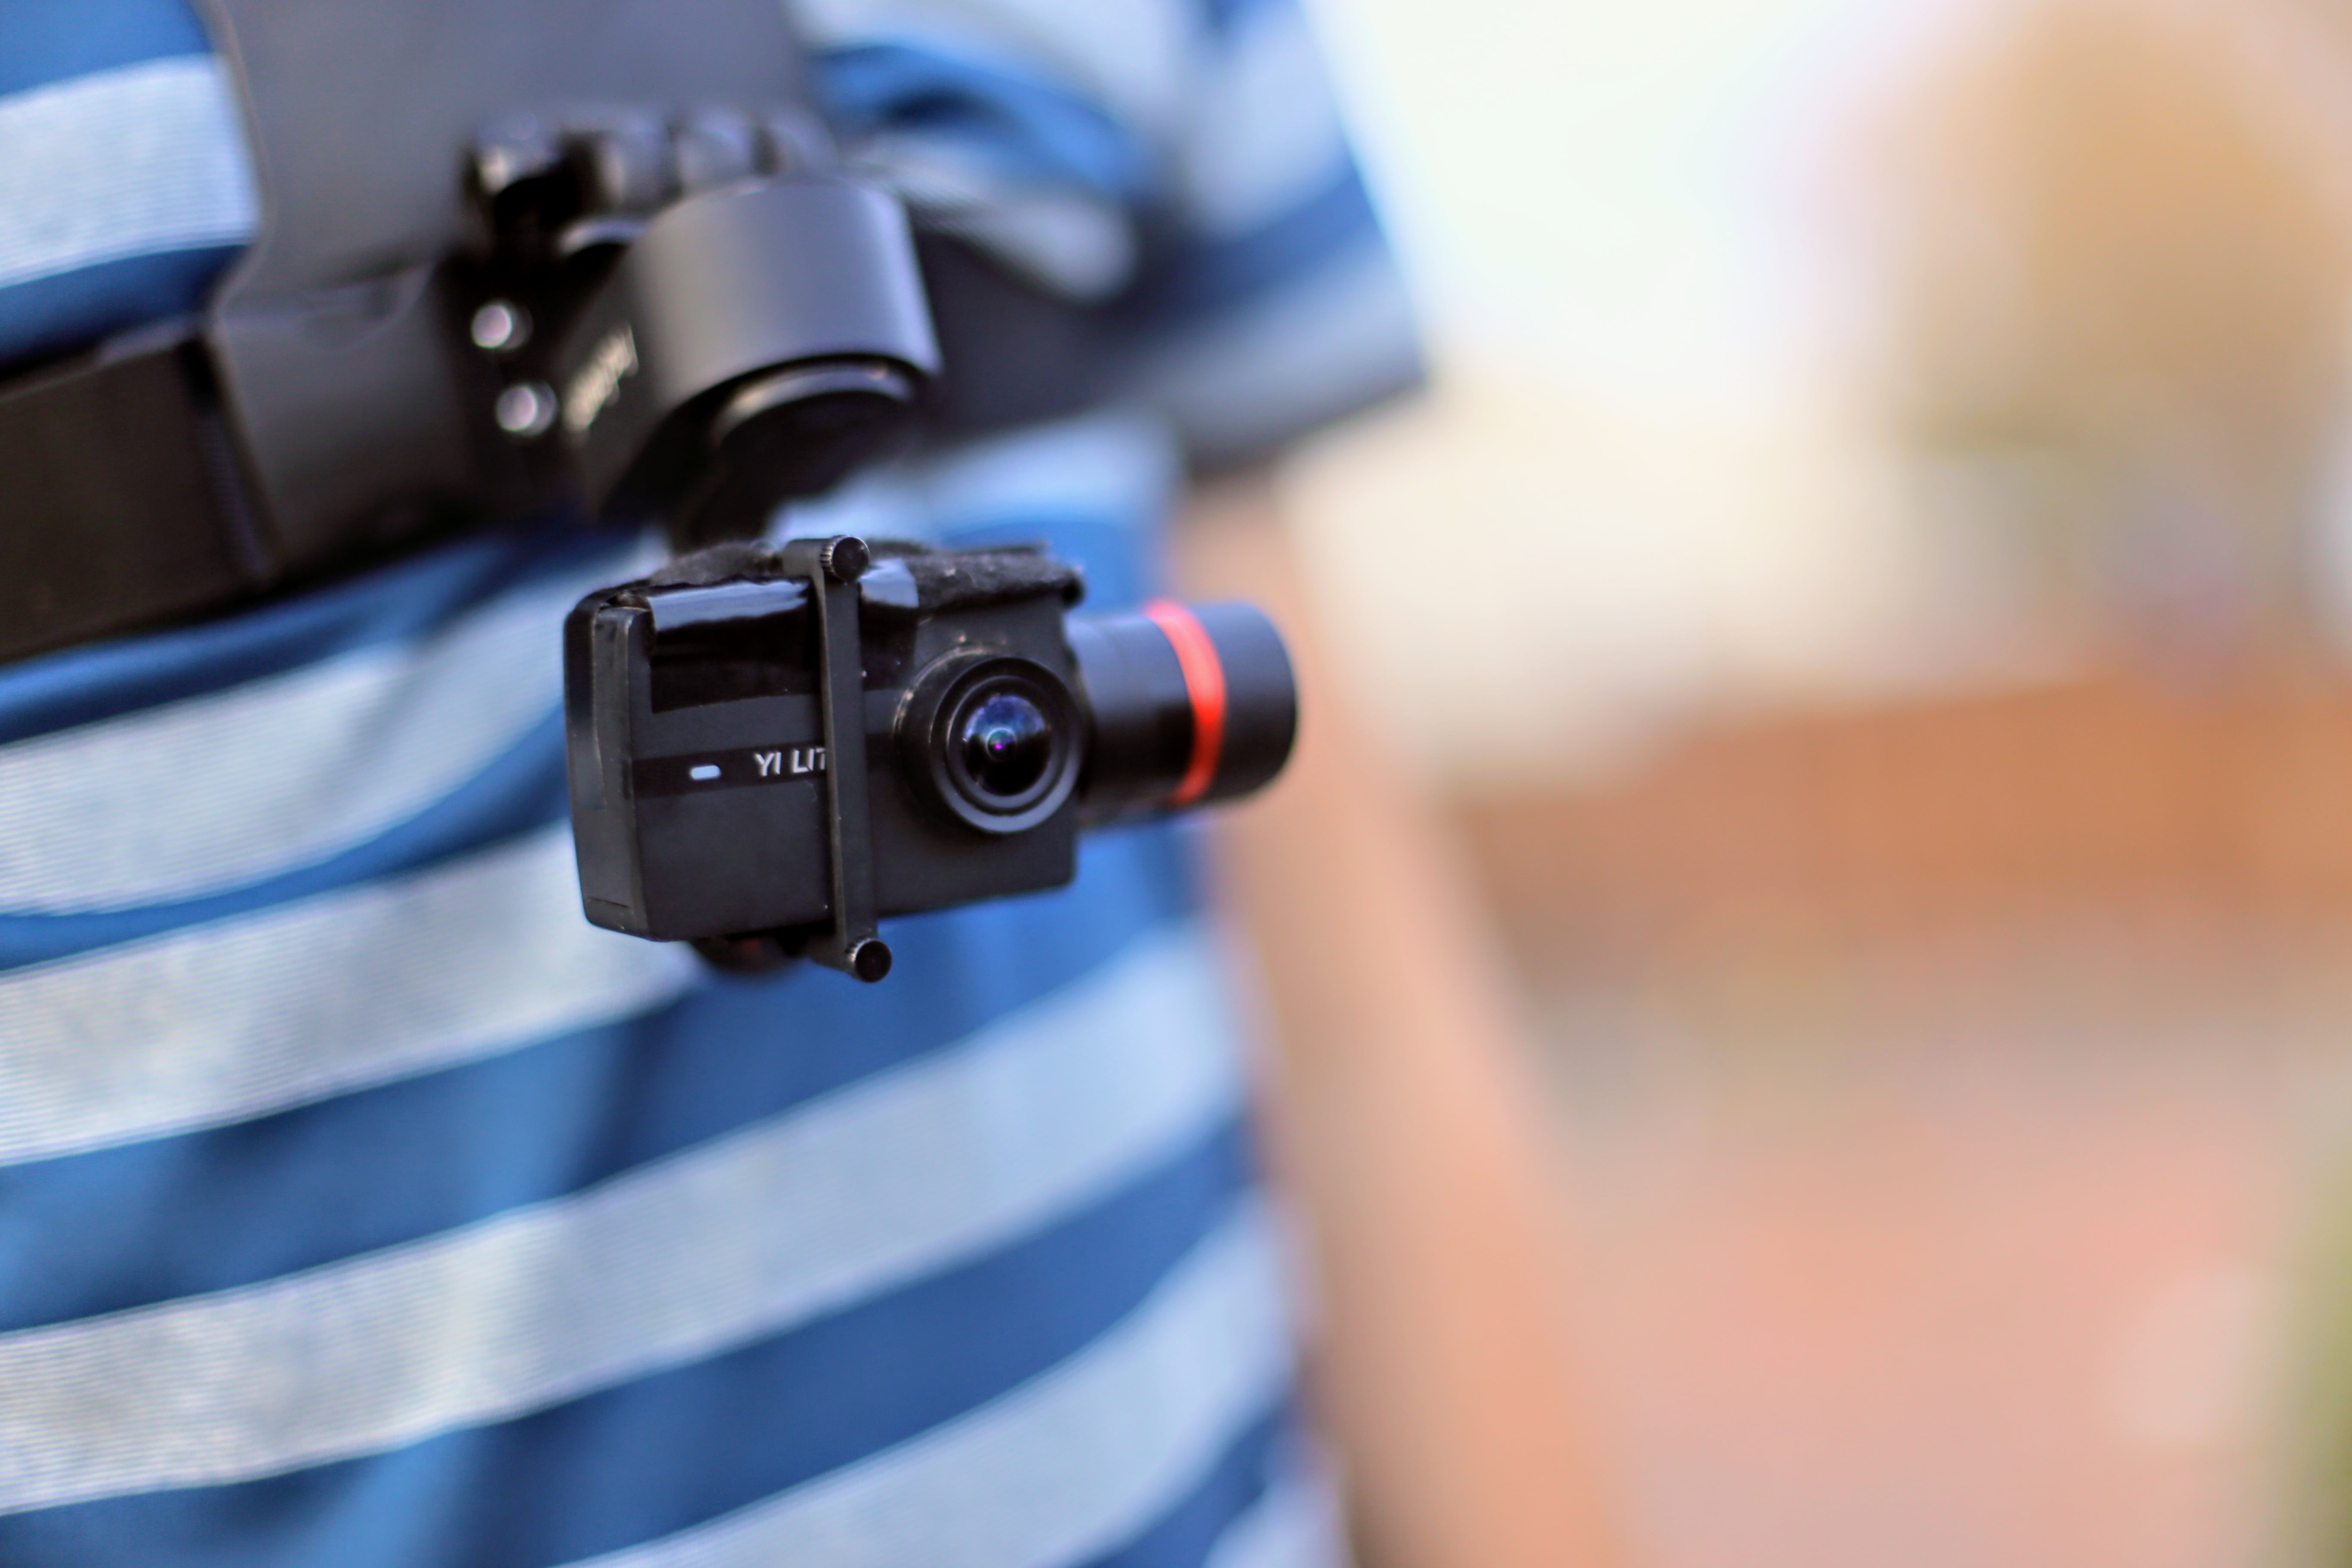
So how did my components work together? All of the products I selected fit together without any special finagling. I took it out for some of my first test rides on a trip to North Carolina. Overall for an untested system it worked great! However there were a few shortcomings. First, the gimbal was sluggish in turns. If you watch the videos from my North Carolina trip you can see that the gimbal lags behind in turns and I ended up having to cut out footage with sharper turns.
The Hohem gimbal comes with an app and bluetooth connectivity that lets you fine tune responsiveness and dead zones of each axis. However, even after making these adjustments, I couldn’t get the gimbal to keep up. I finally figured out that some axis of the Hohem gimbal are more responsive than others, I’m not sure if different motors are used or perhaps the sensors are different. At any rate if I adjusted the mounting of the gimbal so that it was hanging “upside down” on my chest mount, the gimbal tracks through turns beautifully.
Here is an example of the tracking in the proper orientation:
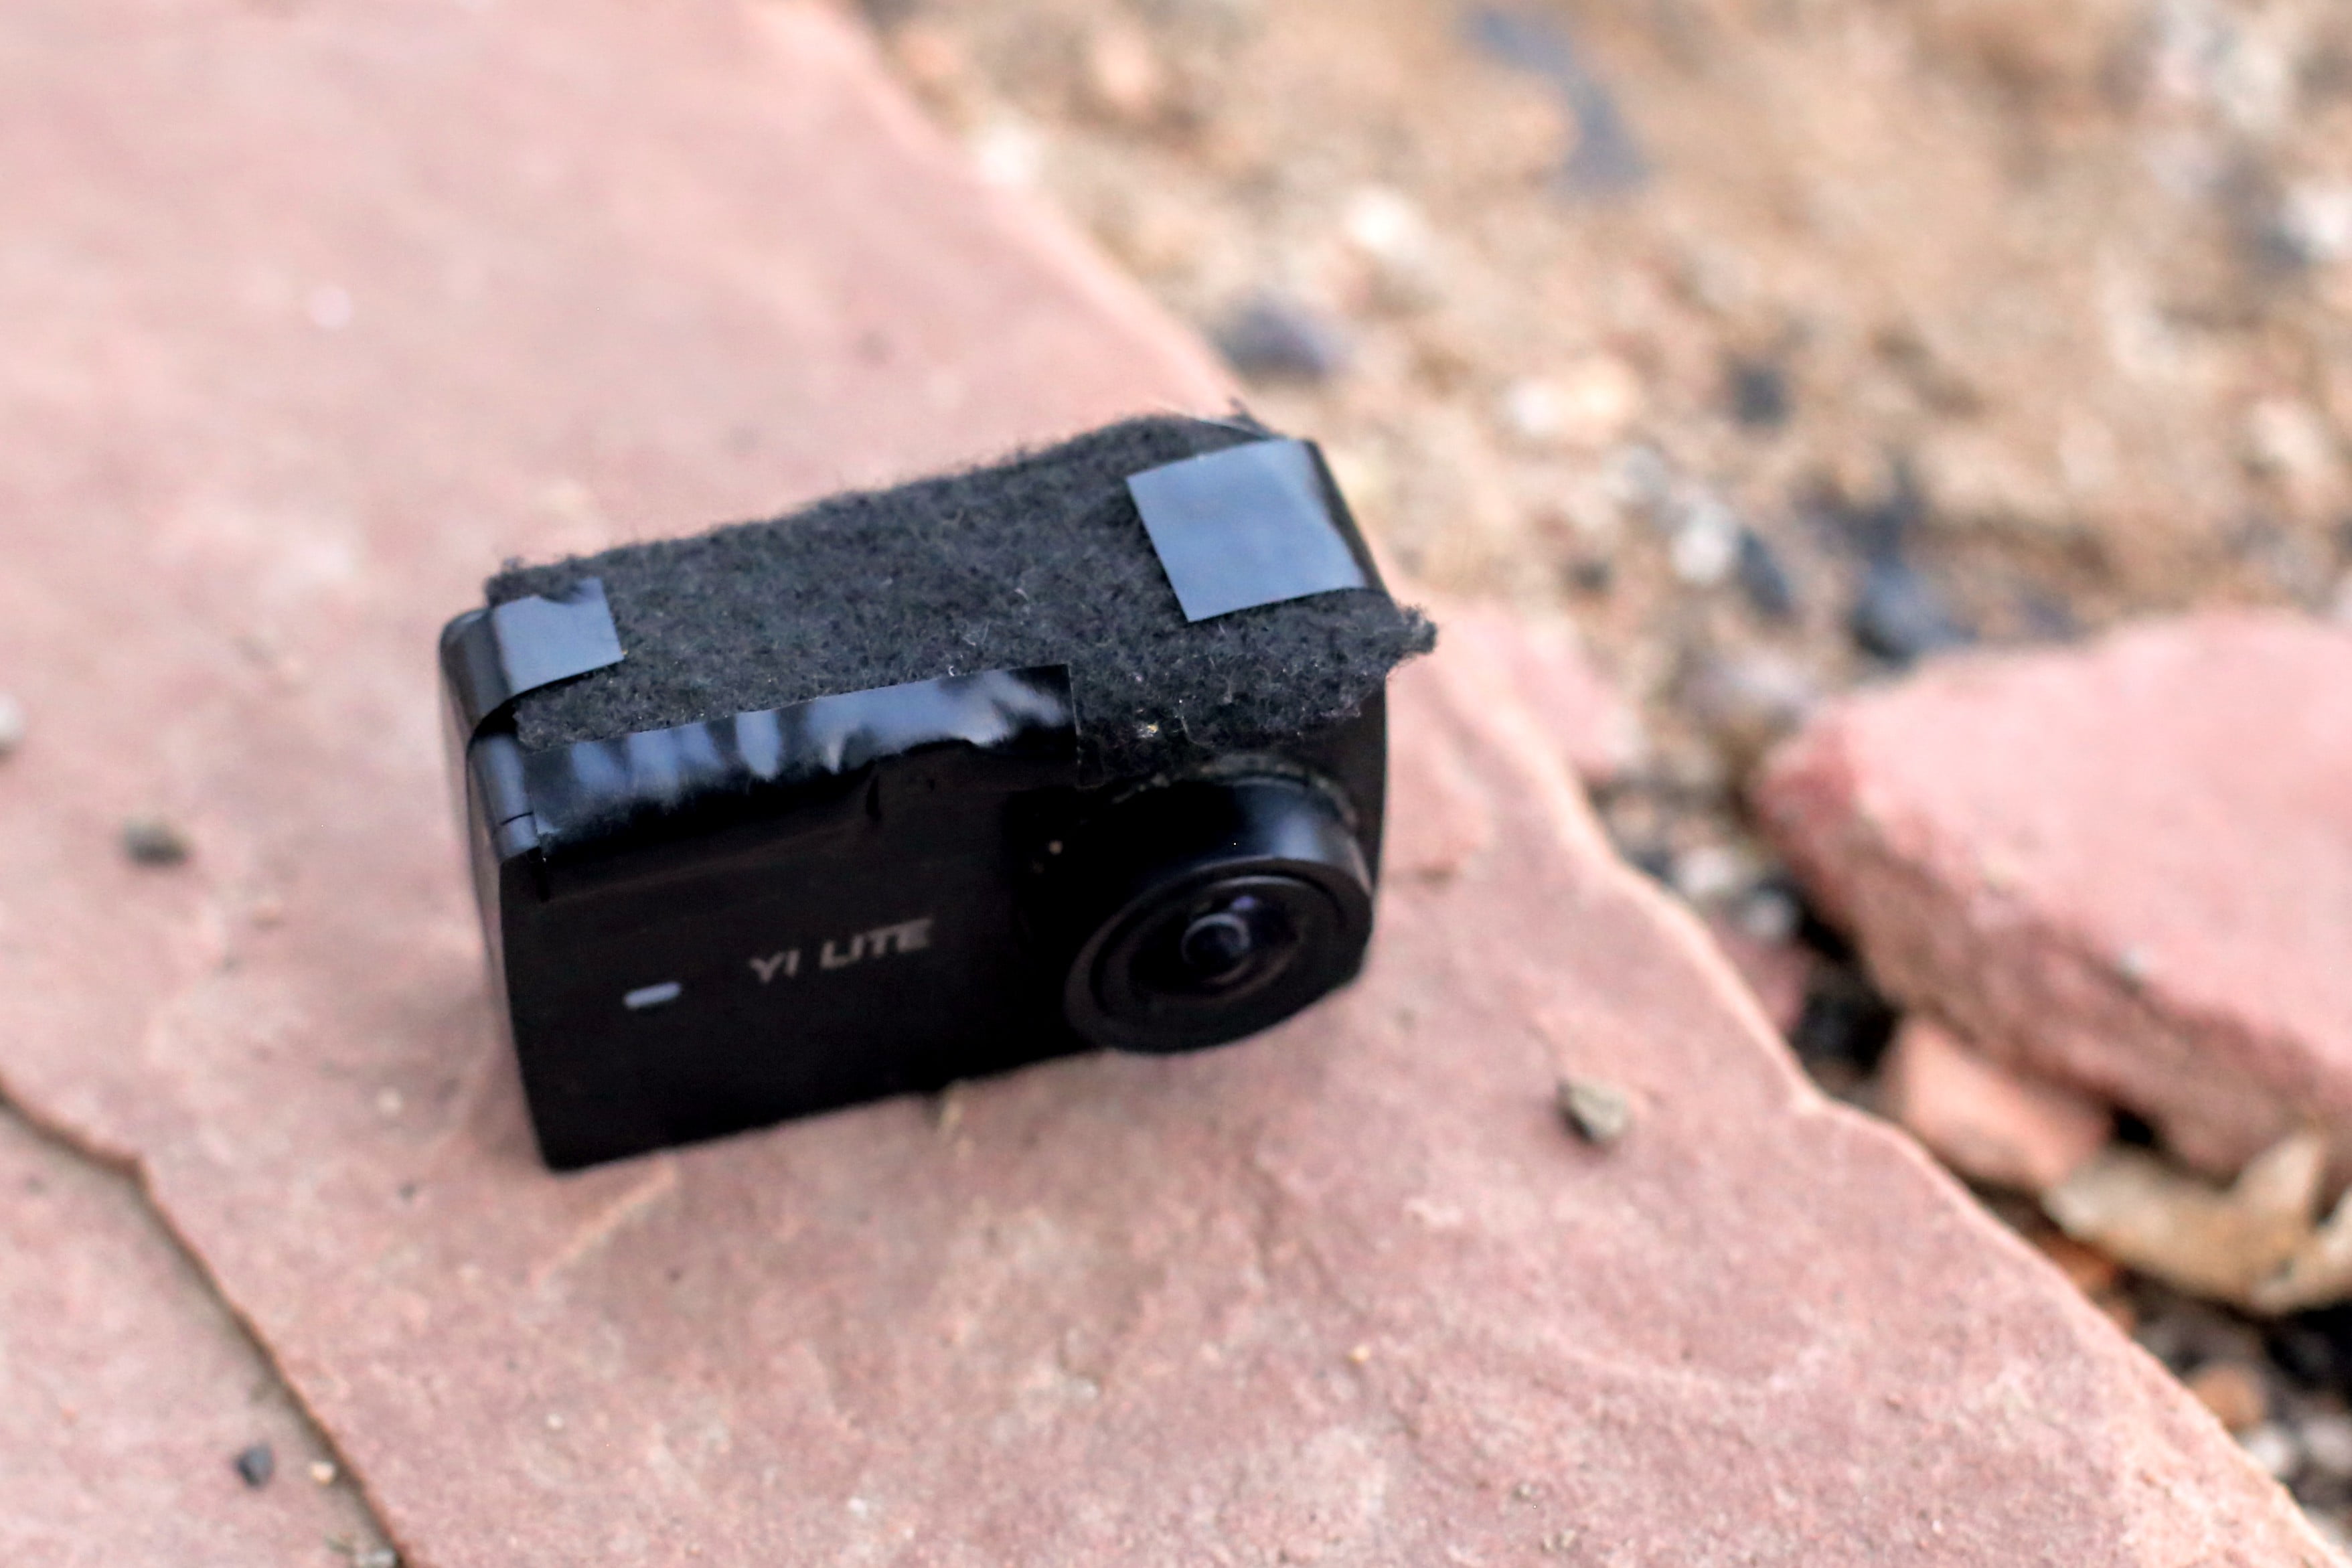
The next challenge that I had was eliminating wind noise. This is a challenge with just about any bike mounted camera. The YI Lite action camera did ok but not great out of the box. Thankfully the fix was free and easy. Since the mics are mounted on the top of the camera, I took a piece of felt and electrical taped it to the top of the camera. It still slides into the gimbal mount fine and the audio is much improved.
The final challenge that I had was dealing with the battery life of the gimbal. The YI action camera has replaceable batteries and they last for a very long time as is. The gimbal on the other hand was done after about 40 to 60 minutes of riding. This was fine for a short riding video. But, it required careful management of the battery resources as the battery is non-replaceable.
There is a solution though. The Hohem Gimbal can be charged while in use through the USB port on the gimbal. This means that I can simply pack an external battery pack (like what you use to charge a cell phone) and cable while on longer rides and charge while I ride. I did this successfully on a full lift service day and had no trouble having gimbal power all day.
My Next Upgrade
All told this setup cost me $300 and is capable of producing some great content. So what is still lacking from my setup? I would say video quality. The YI Lite while great for was it is really doesn’t do too well with fast-moving subjects. The compression tends to smear the video and give a compressed, blocky look. Upgrading to a used Hero 4 Black would set me back about another $50 over my current setup and I think it would be worth the bump in quality.
Hi Matt. What an awesome idea flipping the ginbl on the stuntman. I am trying to stop the “getting lost in the turns” issue with the gimbal.
Did you just screw in the provided gopro attachment on the base of the gimbal over the tripod mount and then attach it to the ball thingo that comes wth the stuntman? Do you think the two little screws holding the gopro mount strong enough? I would much rather screwing in the tripod mount.
It still looks a tiny bit lagging in turns. But much better than what I’m getting.
Look forward to your response.
Hi Blake,
The gimbal is screwed directly into the the threaded tripod mount that comes with the stuntman. I’m not using any gopro mount hardware in this setup.
hi. what settings do you have the gimbal on . cheers . very helpful blog